Showing posts with label Do It Yourself. Show all posts

Saturday, June 28, 2014

DIY Primitive Decor For My Kitchen Table


Earlier in the year I had seen a company selling caddies for flowers for around $50.00 I was able to find the set of jars in the holder for $19.99 at Hobby Lobby. They were on sale for 1/2 off so it was only around $10 plus tax. The others I has seen had berries and other things in them. I love these burlap flowers that I also found at Hobby Lobby. They were not on sale and they were each $2.79. I purchased 6 of them. They had long stems so I folded them over. I have been leaving this on display on my kitchen table. I may mix it up over time and put other things in the jars. I may even use real flowers.

http://blushingbeebyme.blogspot.com/2014/06/diy-primitive-decor-for-my-kithen-table.html


Sunday, December 22, 2013

Holiday Stove-Top Potpourri Mix


 Don't you just love the smells of Christmas!? One of our favorite scents is a homemade mix of berries, cinnamon and oranges simmering on the stove.

Holiday Stove-Top Potpourri Mix
1 whole orange or just the orange peel
1/2 cup cranberries
1 Tbsp. whole cloves
3 sticks of cinnamon or cup of small pieces of cinnamon

One batch stays good for weeks! Just add water and heat it on low whenever you want to fill your house with Christmas goodness.


Saturday, October 26, 2013

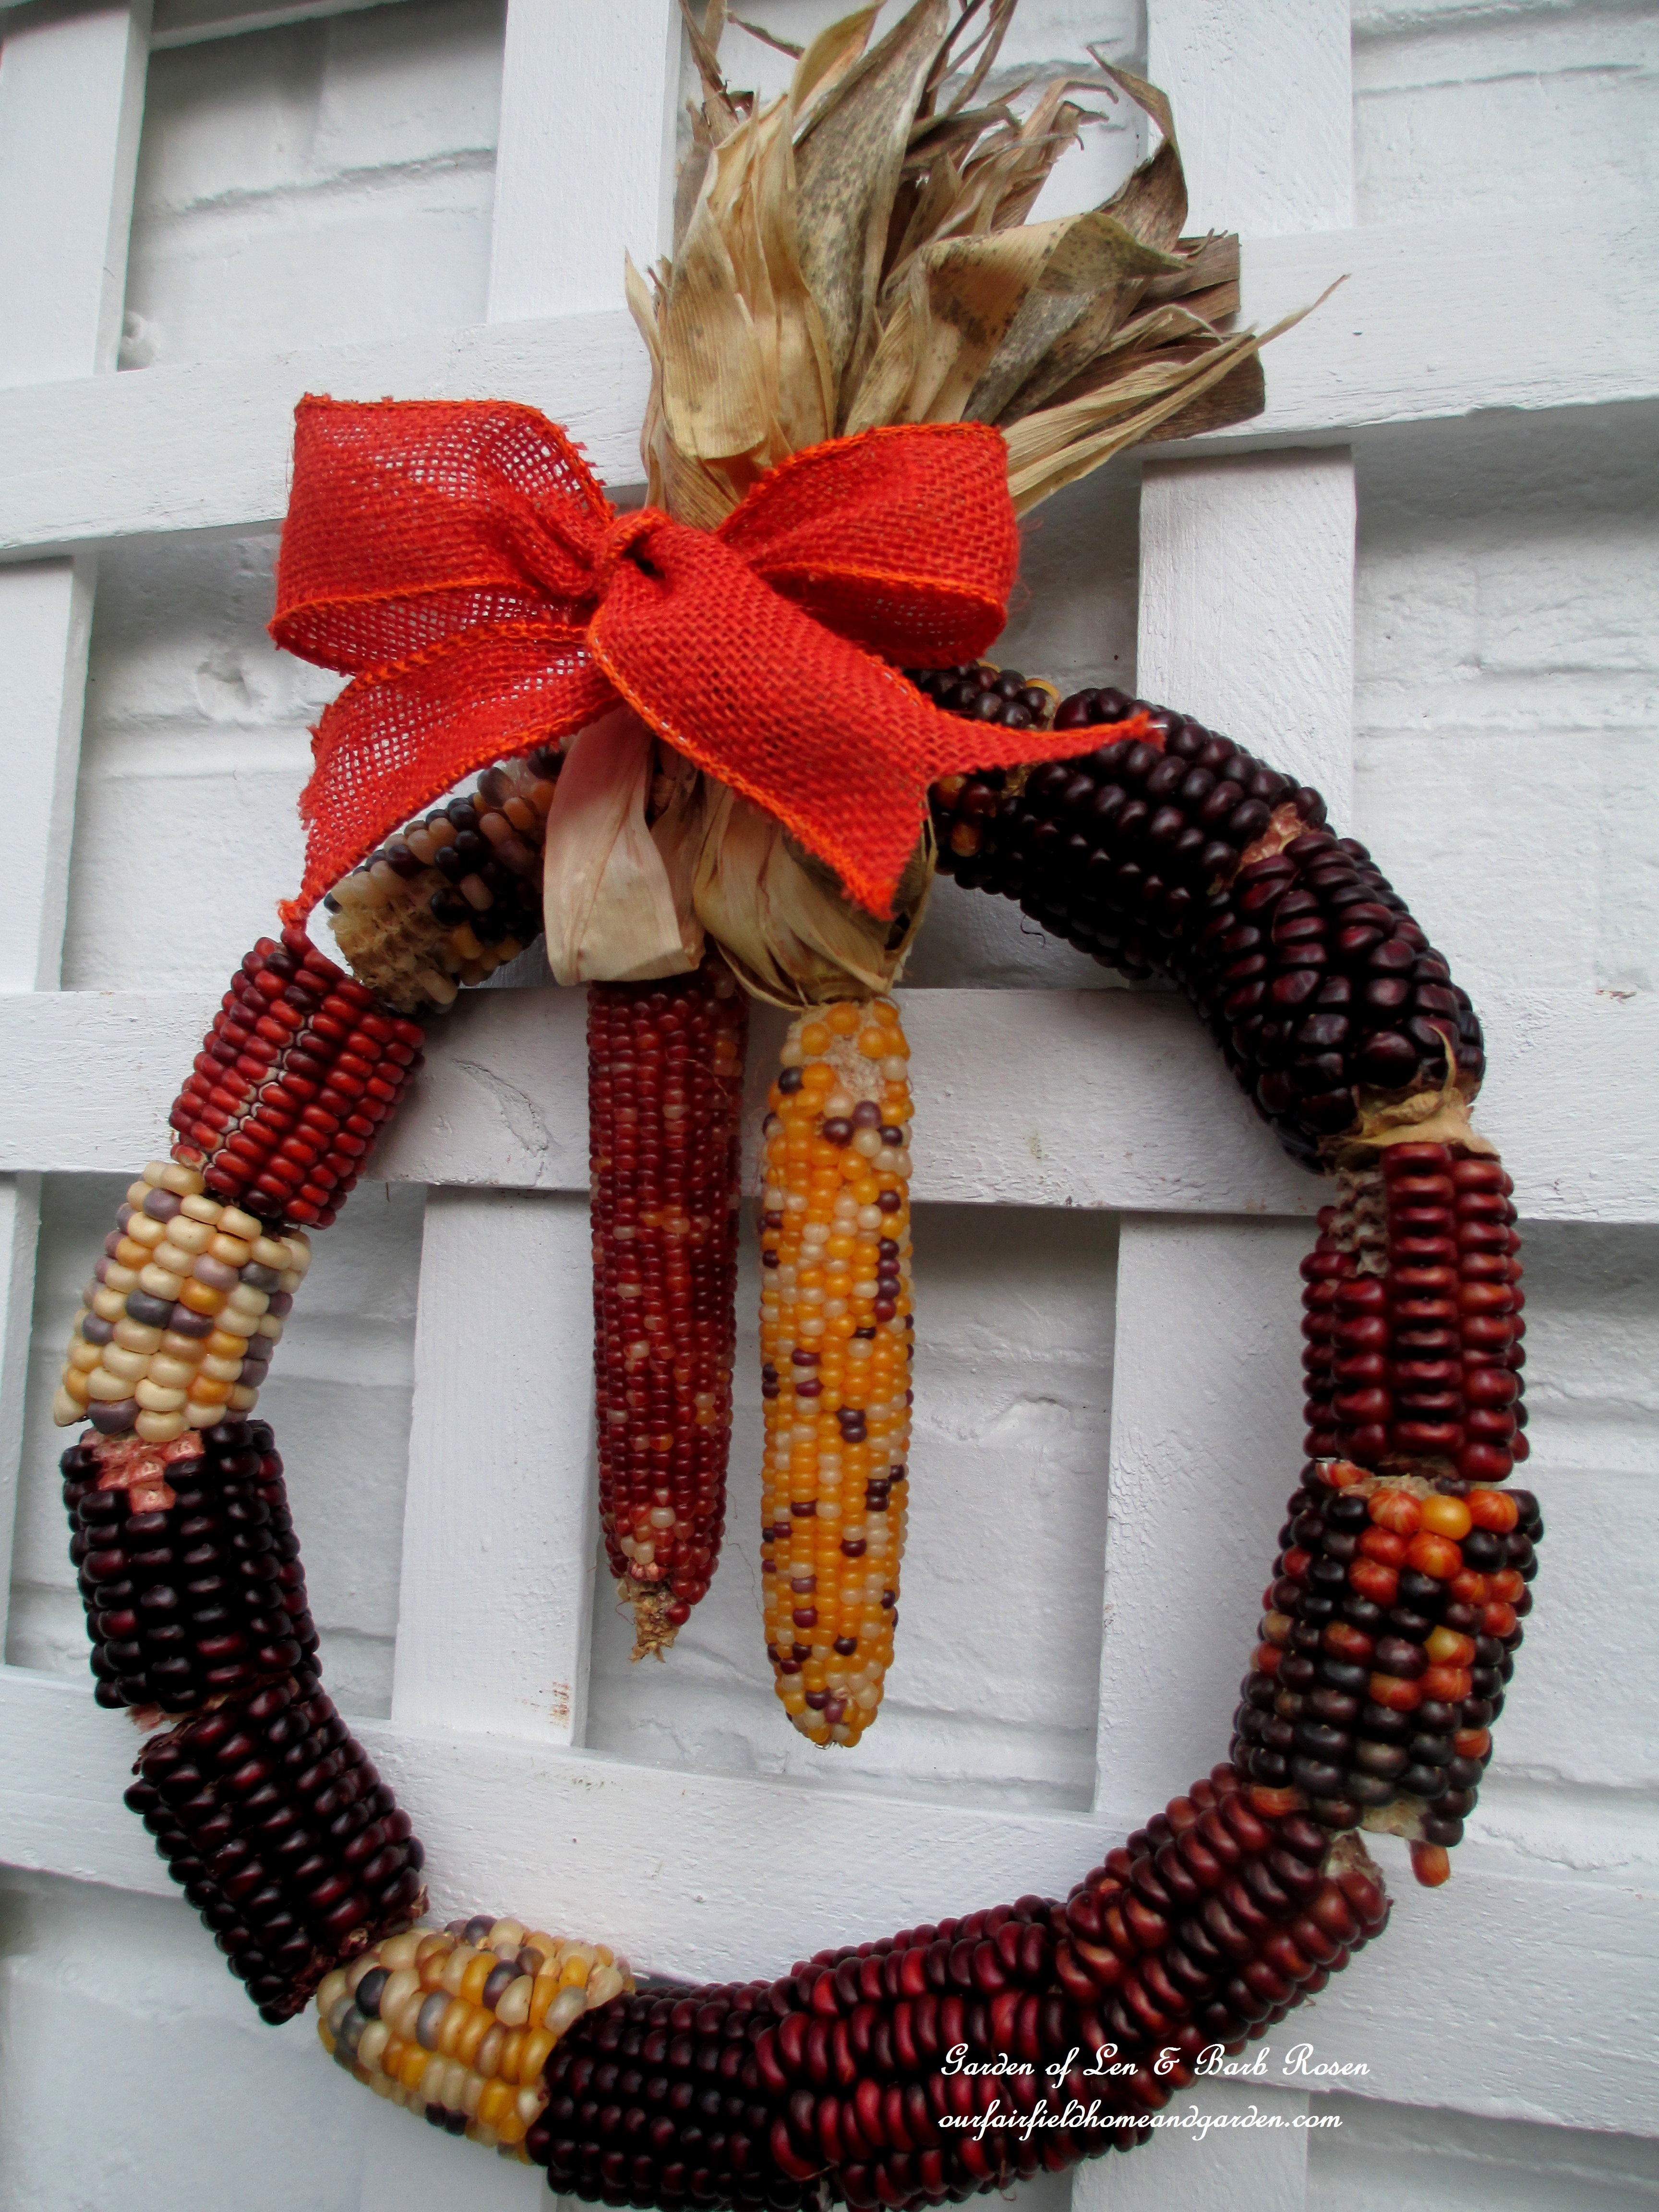
DIY Fall Corn Cob Wreath


Here's the corn cob wreath I spotted in a garden center for $15 !

Here’s the corn cob wreath I spotted in a garden center for $15 !

My version of the corn cob wreath made for just $4.00 !
My version of the corn cob wreath made for just $4 !
 
While buying some winter pansies this week at a local nursery, I spotted a wonderful corn cob wreath. The price was too high at $15 for my wallet, so I decided to recreate it. Since I don’t grow corn, I had to purchase some, but it was only $4 for two bunches of Indian corn. I chose a larger bunch with five ears of corn in darker colors and a smaller bunch in lighter color.

You will need the following materials: 5 large ears of Indian Corn, 2  ears of small Indian Corn, about 30 inches of wire or a straightened wire coat hanger, an electric drill and wired burlap ribbon.

I started by snapping each large ear into three pieces (a total of 15 pieces) and then drilled a hole through each one. Make sure the hole you drill is large enough for the wire. Do the drilling over a piece of wood, so when the bit breaks through the end it doesn’t damage your work table.  Make a twist at one end of the wire before threading the corn pieces so they stay on. Once all the drilled pieces are threaded, twist the wire end pieces together to form a circle. Now attach the small corn pieces using some wired burlap ribbon (which I had on hand!).

Your wreath is ready for decorative seasonal use and will double as a pretty fall birdfeeder too!
After breaking the large Indian Corn into thirds, drill a hole through each piece and insert the wire.

After breaking the large Indian Corn into thirds, drill a hole through each piece and insert the wire.

 
Twist the wire ends together to make a circle.
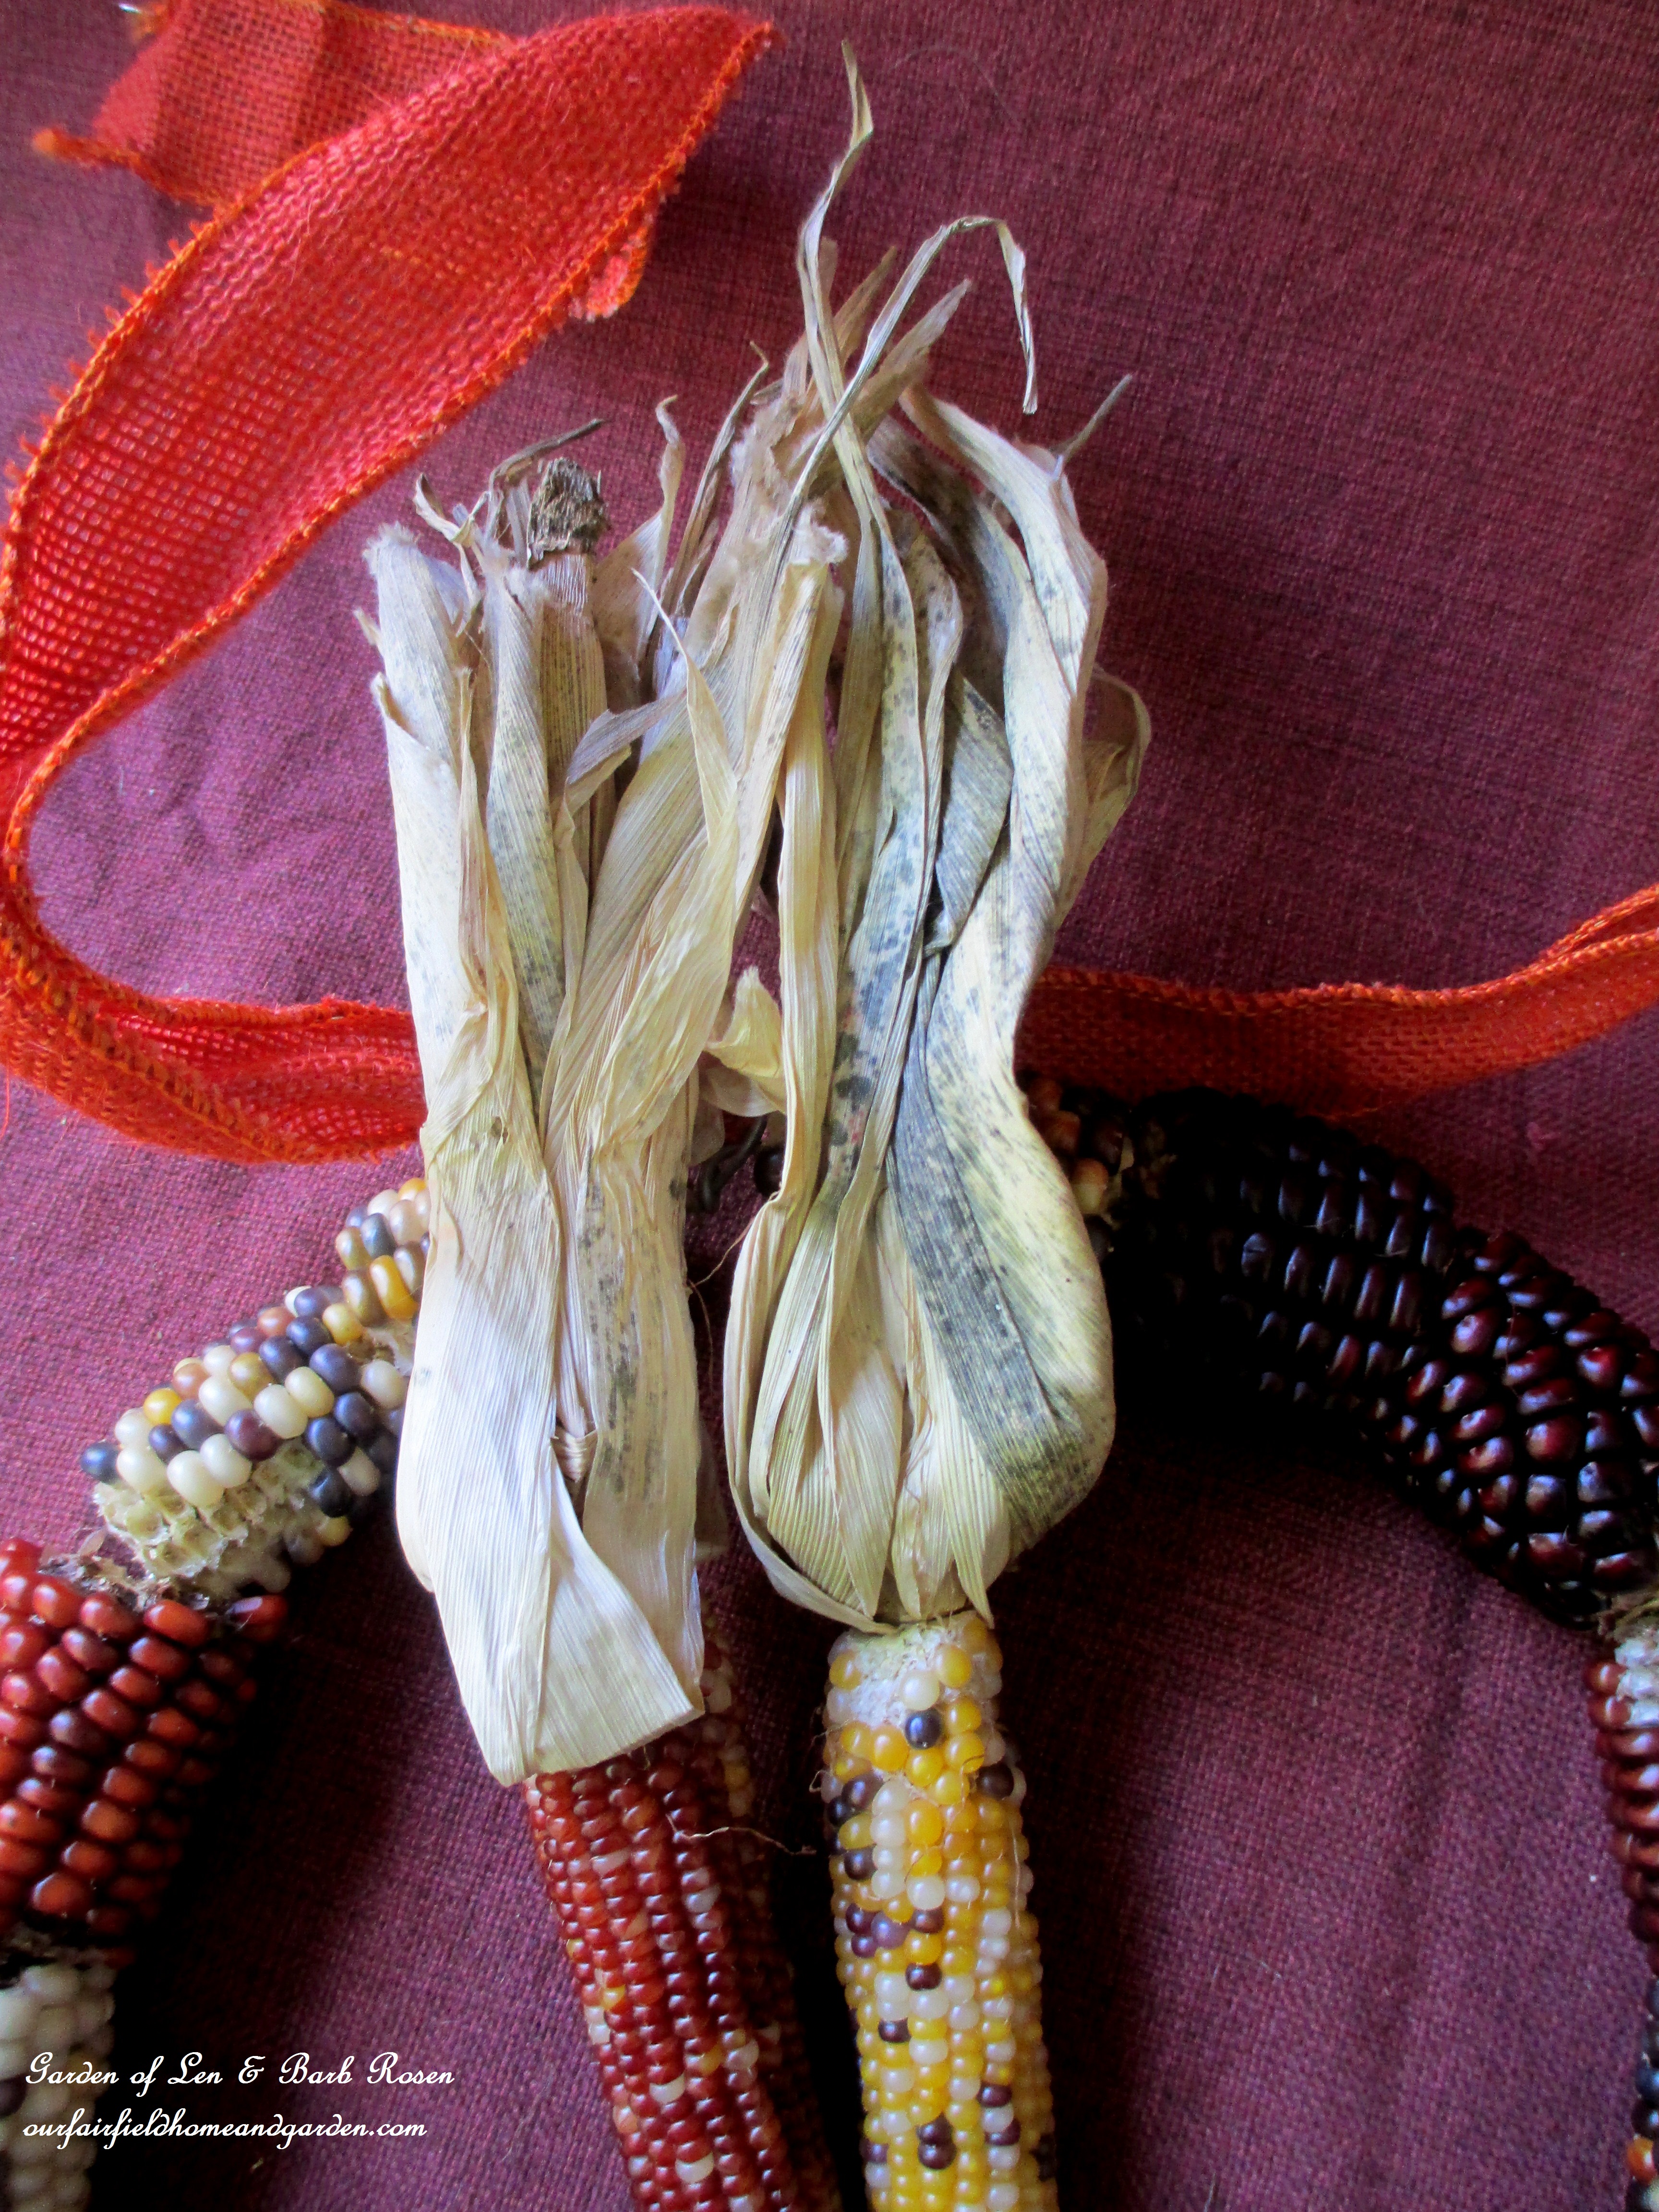
Tie the smaller Indian Corn on with wired burlap ribbon.

Tie the smaller Indian Corn on with wired burlap ribbon.

Corn Cob Wreath finished & ready to hang !

Corn Cob Wreath finished & ready to hang !


You can see the original article here

This post is thanks to Barb Rosen
 

Tuesday, September 10, 2013

DIY Firepit


Saw this today and I think this would be really easy to make so I had to share

A really clever idea of using concrete tree rings of two different sizes separated by pebbles, to make a fire pit .....

Complete instructions here:
http://www.instructables.com/id/50-fire-pit-using-concrete-tree-rings/?ALLSTEPS


This post is thank to https://www.facebook.com/shelly.platt.5

http://blushingbeebyme.blogspot.com/2013/09/diy-firepit.html 


Monday, August 19, 2013

Do It Yourself Flower Cookies


 Saw this today and I am going to try this soon!

Tip
Roll a ball of sugar cookie dough in colored sugar. Snip it in half with scissors and then snip each half into three petals. Gently spread the petals apart and lay flat. When you take them out stick an M & M in the center!

More ideas and tips: http://myhoneysplace.com/category/how-to-andtips/
 

This is thanks to My Honeys Place


Thursday, July 11, 2013

Make a Whole Year's Worth of Laundry Detergent for $30


The cost of laundry detergent seems to keep getting more and more expensive with each passing week.

Making your own laundry detergent can help you to save a lot of money.

I found a great article to help you make your own laundry detergent for a whole year for only $30!

years supply of laundry detergent 

Regular readers of this blog will know that I am completely sold on the No-Grate Laundry Detergent that I posted back in February of this year.  But, like I’ve said many times on this website, I am always open to new ideas! And I really liked this idea that someone posted as a comment awhile back.

A YEARS worth of Laundry Soap!?!?  That’s an idea that is hard NOT to get behind!  Plus, I’ve been curious about the “dry” version of homemade laundry detergent that so many people are fond of. I have never tried it before. I figured it’s high time I did!

Here is the recipe that Anonymous posted (the text in red are my notes):
Anonymous said…
I make a dry version which works better for my family. I hate storing the bottles, shaking it up, and making it more often. I only make it once and it lasts for the entire year for our family of 4.
3 bars Fels Naptha, grated ($1.33 x 3)
1 box Borax  ($5.85  -  76 ounces)
1 box Washing Soda ($4.07  -  55 ounces)
2 cups of baking soda ($0.53 cents)
2 containers of Dollar Tree Oxyclean (I bought mine at Family Dollar store…SUN Brand…$4.00 each)
1-2 containers of Purex fabric softener crystals ($6.97  -  28 ounces) 
Use 2 tablespoons per load. Put it right in the barrel if you have an HE washer.
To grate the bars of soap I decided to make it easier on myself and use my ancient Hamilton Beach food processor. I figured if it broke in the process it would give me a good excuse to get a new one! But fortunately (unfortunately?) it handled the soap just fine. I would offer one tip though if you decide to use your food processer to “grate” your soap: add something else to the bowl to aid in the process. I added a cup of the SUN Oxygen Bleach to each bar when I processed it. It seemed to help the blades do their job better.


years supply of laundry detergent

My only other tip for this recipe has to do with the “mixing”. Once you add everything, you have a LOT of ingredients to mix together. I decided to put it all in a kitchen garbage bag (doubled) and tumble it all together. Just tie it off tight and turn it over a handful of times and you’re good to go! Now you have a nicely integrated batch of laundry detergent that should last a family of four ONE YEAR!


years supply of laundry detergent

Since we are over the “family of four” limit, and I tend to think we have more dirty laundry than your AVERAGE family…I’m not expecting this to last a full year….but based on my initial use of this (2 Tablespoons per load)….it’s going to last us a GOOD, LONG time! I did half a dozen loads of laundry with it before we left on vacation and was completely satisfied with the results! So much so that I’m planning on making TWO MORE BATCHES when I get home from vacation to give to my daughter AND my daughter-in-law. :-)  Fun gift idea don’t you think?
This was first posted on http://www.onegoodthingbyjillee.com/


Wednesday, June 26, 2013

Make Your Own Wall Art From Dollar Store Doormat


This is a doormat from the dollar store! 
I could not find instructions but it seems pretty easy just find a paint you like and spray it. 
I love the distressed look of it!

This post is thanks to http://MyHoneysPlace.com/
http://blushingbeebyme.blogspot.com/2013/06/make-your-own-wall-art-from-dollar.html 
 

Monday, May 13, 2013

Cupcake Bouquet!


Make a cupcake bouquet!

I think this would be perfect for so many things baby showers, birthdays, etc.

Thanks LightInTheBox

http://blushingbeebyme.blogspot.com/2013/05/cupcake-bouquet.html

strtwgdiv_thumb[1]

Saturday, May 4, 2013

Mother’s Day DIY vase from a PVC pipe

Photo: Here’s a great DIY project for Mother’s Day. Mom will love this!  http://bit.ly/XzvEpO


Here’s a great DIY project for Mother’s Day. Mom will love this! http://bit.ly/XzvEpO


Everybody has a mom, even Man Podger David. No, he wasn’t brought down on a crafty alien spaceship, though sometimes his projects are out of this world! That was a horrible joke, by the way. David’s gift for Mother’s Day is a DIY vase collection made out of PVC pipe, so even though my joke was bad, it was completely true. Here’s how he did it.

————–
I’m getting a lot of requests for Mother’s Day themed items at my Etsy store. So I had Mother’s Day on the brain when I visited Home Depot recently. I found myself, as I often do, in front of all the PVC piping thinking “there must be something I can make out of this!” There are so many great shapes and sizes and it’s all so affordable, but I’ve never been able to come up with anything. And it suddenly dawned on me that I could use the various pipes to make vases. And then I thought, why not wrap the pipes in old photos and make a fun, nostalgic centerpiece for a Mom’s Day celebration? For a total cost was about $12.

Supplies

PVC Pipes of various widths
PVC Caps to fit the pipes
PVC Pipe Cement
Outdoor Mod Podge
Wooden Base (mine is from Michaels)
Glue (I used E-6000)
Laser copies of old photos
Foam Brush (not pictured)
Forstner Bit and drill (optional)

1) I cut the PVC pipes into various lengths – just eyeballing what I thought was good. I used a miter saw, but any saw will cut through the plastic.

2) Next up (following the manufacturer’s instructions) I used the PVC cement to glue the caps to the pipes and set them aside to dry.

3) I then gathered and scanned some old family photos. I resized each photo to fit a specific pipe – I needed it to be tall enough and wide enough to wrap around its designated pipe. I also played a little bit with the tint of each picture to provide some contrast.

4) I printed the photos out onto plain paper using a laser printer. The laser is key – I knew I was going to soak the images in water and inkjet ink will run. Kinkos or Staples can make a laser copy for you if you need.

5) I dropped the image in some water and, while it soaked, I coated the outside of the PVC pipe with Outdoor Mod Podge. I then removed the image from the water and gently ran my fingers down it to remove excess water and then applied it to the pipe using my fingers to smooth out bubbles etc. I added a little more Mod Podge to seal where the ends of the paper overlapped. I did that for each pipe and then set them aside to dry.

6) This next step is totally optional. I used two Forstner bits to drill holes in the wood base. If you don t have a drill press you can skip this.

7) I gave the photo-tubes a sealing coat of Outdoor Mod Podge and, when that was dry trimmed away any excess paper from the tops and bottoms.

8) Next I glued the tubes to the base using E-6000. (NOTE: If you didn’t drill the holes in step 6 then just glue the pipes directly to the base. I checked and it will work – my suggestion is that you cluster the pipes closer together so they touch each other to provide a little extra stability.) After everything has had time to fully dry (24 hours) fill the pipes with water and insert your flowers.

3 Some further thoughts 1) I think next time I will paint the tops of the PVC pipes for a more finished look. 2) It occurred to me that this could become a very adaptable thing. If you used a thicker base and drilled deeper holes you could skip gluing the tubes in place and just let the base hold them. Then you could then decorate other tubes with colorful graphics or fabric or what have you and, when you wanted to, swap out the tubes to suit your mood. I hope you enjoy my DIY vases.


Thanks http://modpodgerocksblog.com/ 

http://blushingbeebyme.blogspot.com/2013/05/mothers-day-diy-vase-from-pvc-pipe.html

strtwgdiv_thumb[1]